Answer first
World 9 is not ready to be called a complete walkthrough
The live Poki build exposed five consecutive World 9 rooms during this check. We completed Levels 1, 3 and 4 from their normal starts. Level 2 and Level 5 have useful direct evidence, but neither has a retained, repeatable completion route yet.
That is evidence for this checked World 9 sequence only. It is not a claim that every World always contains five Levels, and it does not establish a final game-wide Level total.
Until the two missing completions are reproduced, this URL remains
noindex and is excluded from the sitemap. The confirmed
steps below are available for editorial review without presenting
the page as finished.
World 9 · Level 1
screen-wrap route and gravity switch
Starting layout
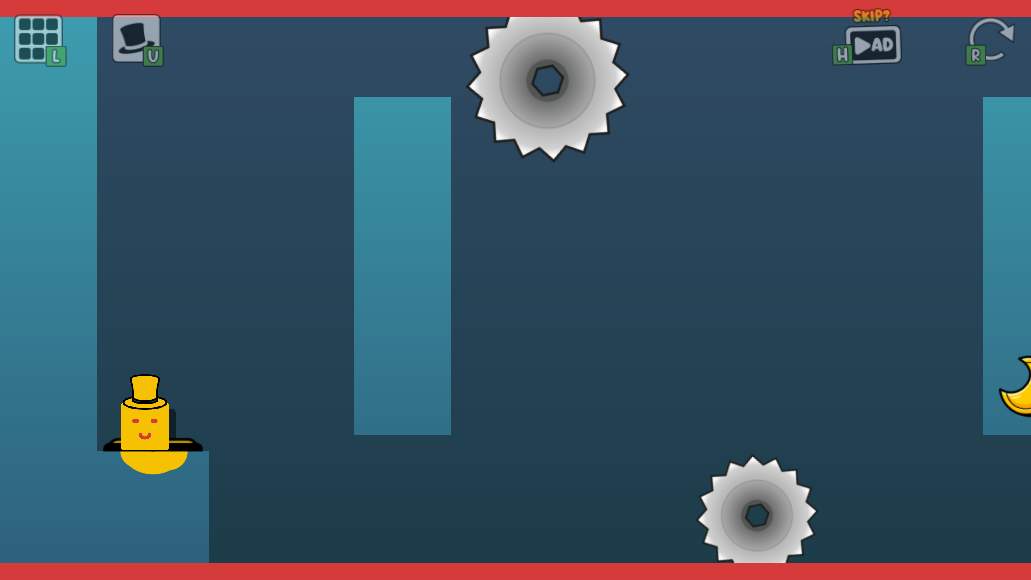
Oozy starts at the lower-left with vertical screen wrapping active. Two tall walls lead to a narrow saw gap and a small signal platform. The right half contains three signal-linked saws, a reverse-gravity switch between two fixed saws and the finish at the far right.
Finish and moon
Finish: At approximately (3260, 360), on the far right beyond the reverse-gravity saw pair.
Moon: Begins near approximately (1280, 480) and moves to approximately (1480, 480) when the signal is pressed. It remained present and uncollected during the successful completion. The tested completion worked without collecting it.
Tested route
Reach the signal platform through the two early screen wraps and the narrow saw gap, press it, then skip the moon. Jump right early enough to wrap below the first large saw, continue through the next wrap, descend into the reverse-gravity switch, move left until clear and then run right through the final wrap into the finish.
Route order
- Move right and use a bottom-to-top wrap to land on the first tall wall.
- Continue right, wrap again and land on the second tall wall.
- Reduce horizontal speed before the paired saws, pass the narrow wrap gap and steer right onto the small signal platform.
- Press the signal and let the linked saws finish moving. The successful route did not detour left for the moon.
- Jump right early from the signal platform so Oozy wraps to the bottom before reaching the first large saw, then continue right underneath it.
- Use the next vertical wrap to approach the reverse-gravity switch from above, slow near x=2670 and descend into the switch between the two fixed saws.
- After gravity reverses, steer left until clear of the switch saws, then move right through the final wrap and into the finish.
Safer approach and common failures
Safer approach: Treat the signal platform and the reverse-gravity switch as braking checkpoints. Release horizontal input before the narrow saw gap, settle on the signal platform before the early right jump, and slow near x=2670 before dropping into the switch.
- Wrapping too far left of either early wall and cycling beside it instead of landing
- Entering the narrow saw gap with too much rightward speed
- Jumping too late from the signal platform and hitting the upper signal-linked saw
- Detouring for the optional moon and adding an unnecessary narrow wrap
- Approaching the reverse-gravity switch at full speed and touching one of its two saws
Evidence chain: direct current-build completion S32 .
World 9 · Level 2
lower route to the vertical room
Starting layout
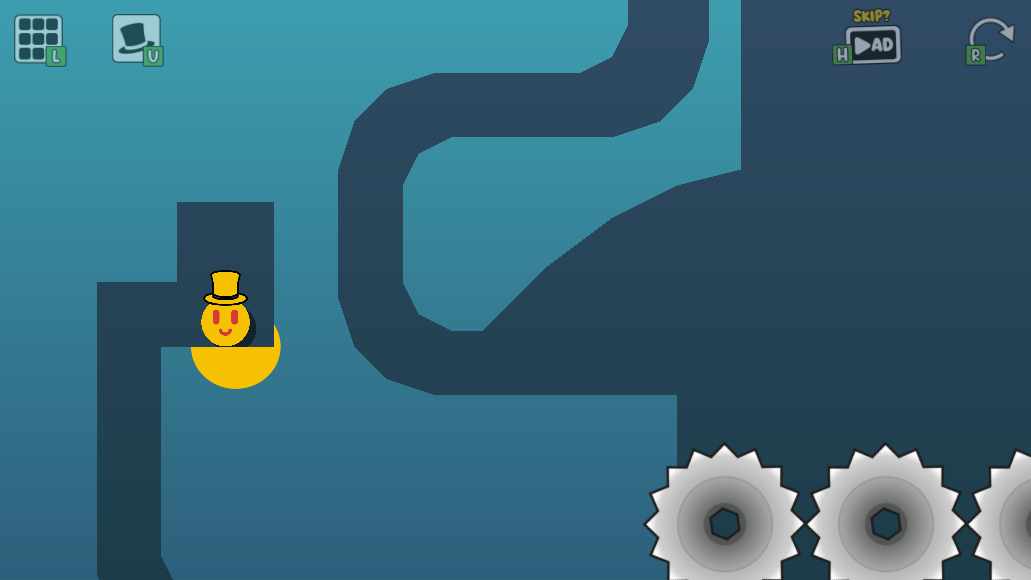
Oozy starts in a pocket at the lower left of a tall room. The lower route drops to a saw-lined floor and rises along a large right-side ramp toward stacked platforms. One signal button sits in a narrow right-side section; the finish is near the top and the moon is lower and farther right.
Finish and moon
Finish: Near approximately (2500, 420), in the upper portion of the room.
Moon: Near approximately (2820, 1400), below and to the right of the finish. Its requirement remains unknown.
Confirmed route so far
Reach the upper finish. Only the lower approach has been reproduced; the signal-button route, moon requirement and finish route remain unverified.
Verified steps and boundary
- Move left out of the lower-left starting pocket and drop to the bottom route.
- Travel right across the bottom, continue along the rising ramp and use its launch to reach the lower-right middle platform.
- On the middle platform, move left until Oozy is clear of the narrow shelf's underside, then run and jump right onto the shelf and brake left before the adjacent saw.
- Build leftward speed on the shelf, jump across the room and brake on the lower-left platform.
- Ride the curved left route and steer right near its crest to land on the platform below the first vertical shaft.
- The remaining button, upper-route, moon and finish order is unverified.
- The input needed to exit the first vertical shaft
- The signal button’s current visible effect and the route after it
- The moon requirement and a clean transition to Level 3
No minimal or safer solution is published for this Level until an end-to-end route is reproduced.
S8 shows a 09:58–10:32 route in its recorded build. The opening matches our current capture; the remaining route still needs direct current-build verification.
Evidence chain: partial direct current-build playtest S36 ; recorded-build lead S8.
World 9 · Level 3
two-stage moving-saw ascent
Starting layout
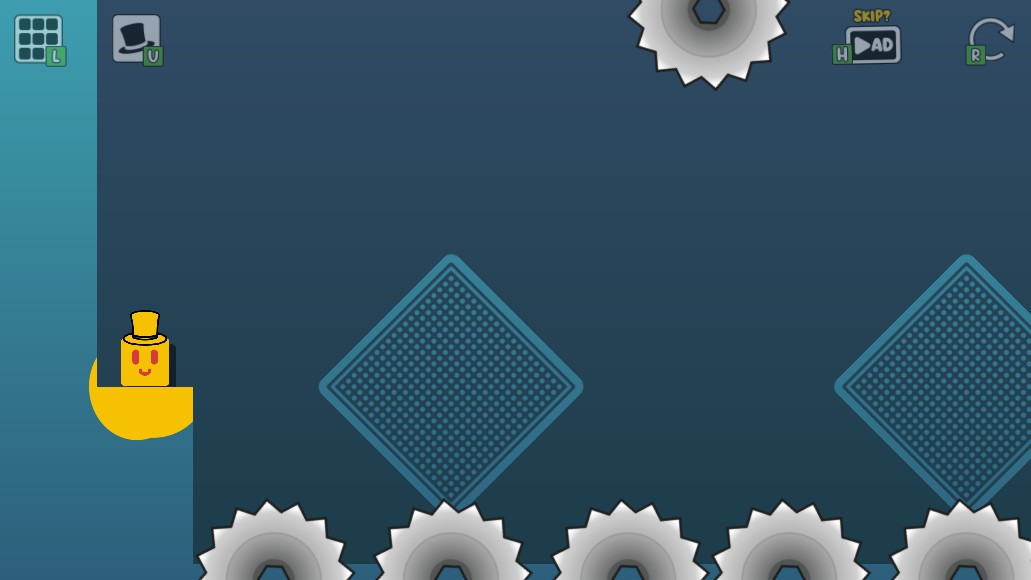
Oozy starts at the lower-left of a tall room. Two diamond bouncers lead right past vertically moving saws and a moving moon. A tall right-wall bouncer launches the upper route back to the finish at the upper-left.
Finish and moon
Finish: At approximately (200, 160), at the top of the narrow shaft on the far left.
Moon: Moves vertically near x=1500 above the second lower diamond and beside a vertically moving saw; it followed Oozy after collection on the successful run. Its requirement remains unknown.
Tested route
Bounce across the two lower diamonds using separate timing windows for the vertical saws, reach the tall right wall and rise above the fixed upper-right saws. Move left, fall through the upper gap, cross the two horizontal saws in two stages with a controlled stop between them, then use the small left bouncer to reach the finish.
Route order
- Move right onto the first diamond and wait for the first vertical saw to be rising through its lower window before taking the next bounce.
- Land on the second diamond, then pass the second vertical saw while it is moving down through the lower part of its path. The reproduced run collected the nearby moon during this crossing.
- Continue to the tall right-wall bouncer and let it send Oozy upward.
- Steer left only after rising above the two fixed upper-right saws.
- Drop through the opening between the upper platforms and stop on the right side of the horizontally moving saw pair.
- Cross the right saw, brake in the gap between the two moving saws, then cross the left saw in a separate window.
- Continue left, align over the small bouncer and use it to climb the final shaft into the upper-left finish.
Safer approach and common failures
Safer approach: Treat every moving saw as a separate checkpoint. Release horizontal input after the right-wall launch, after dropping through the upper gap and again between the horizontal saws; carrying full speed through those transitions caused avoidable collisions during testing.
- Leaving the first diamond before the first vertical saw opens the route
- Approaching the moon saw while it is moving upward into Oozy's path
- Turning left before rising above both fixed upper-right saws
- Trying to cross both horizontal saws in one uninterrupted movement
- Reaching the small left bouncer with too much rightward speed and colliding with the nearby saw
Evidence chain: direct current-build completion S33 .
World 9 · Level 4
growth route and button
Starting layout
Oozy starts on the left side of a long floor containing five growth fruits and one shape-reset item. A button sits above the upper-left floor, while the finish is suspended between two fixed saws near the middle of the room.
Finish and moon
Finish: Suspended near the middle of the room at approximately (980, 320), between two fixed saws.
Moon: Near approximately (1620, 340), above the right half of the floor. It remained uncollected during the successful completion. The tested completion worked without collecting it.
Tested route
Collect the two middle-right growth fruits, reverse for the left fruit, and use the three-fruit tall form to press the upper-left button. Move right through the shape-reset item, collect the final two growth fruits, return beneath the middle finish, jump straight into its saw-lined opening and press jump again to advance.
Route order
- Run right and collect the first two reachable growth fruits, then reverse before the far-right section.
- Return left and collect the left-side growth fruit as the third growth item.
- Use the resulting tall narrow form to jump into the upper-left button and wait for the linked platform to finish moving.
- Travel right; the tall form crosses the shape-reset item and returns to the regular square form.
- Continue right to collect the remaining two growth fruits, then return toward the suspended finish.
- Align beneath the finish, jump between the two fixed saws, and press jump once more while held inside the finish.
Safer approach and common failures
Safer approach: Brake before reversing after the first two fruits, and approach the finish from directly below. Short corrective taps near the finish are safer than carrying a full-speed horizontal run into the two saws.
- Continuing too far right before collecting the left-side fruit and losing the intended three-fruit order
- Trying to reach the upper-left button before Oozy has become tall enough
- Crossing the button route before the signal-linked platform has finished moving
- Approaching the suspended finish diagonally and touching one of its two fixed saws
- Waiting inside the finish without sending the additional jump input needed to advance
Evidence chain: direct current-build completion S34 .
World 9 · Level 5
Lower the Bridge, Then Survive the Orbiting Saws
Starting layout
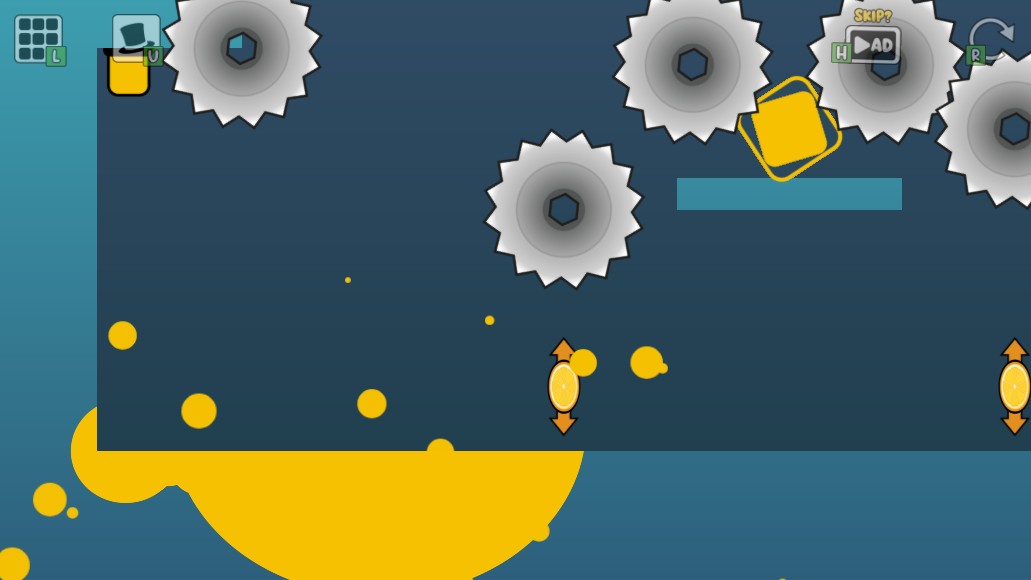
The player starts on the upper-left platform. Two large saws guard the upper gap. Button A is on the upper-right platform; a central bridge sits below; button B is at the bottom center among four orbiting saws and two fixed side saws.
Finish and moon
Finish: The finish begins near the upper center and descends toward the lower center after button B is pressed.
Moon: The moon begins near the upper-right area and descends after button B is pressed. Its requirement remains unknown.
Confirmed route so far
Reach button A to lower the central bridge, use that bridge to reach button B, then stay alive while the finish and moon descend.
Verified steps and boundary
- Cross the upper gap to the right platform.
- Press button A.
- Return toward the center and drop onto the lowered bridge.
- Wait for a safe opening, then drop to button B.
- Press button B.
- Survive while the finish and moon descend.
- The final repeatable movement pattern is still unverified.
- A repeatable movement pattern during the final orbiting-saw phase
- Whether the descending moon must be collected
- A retained end-to-end run that reaches the finish and advances to the next World
No minimal or safer solution is published for this Level until an end-to-end route is reproduced.
Evidence chain: partial direct current-build playtest S35 .
Publication boundary
What must happen before this page can enter search
- Complete Level 2 from its normal start and retain the transition to Level 3.
- Record the Level 2 signal effect, upper route and moon result without filling gaps from the older recording.
- Reproduce a safe final pattern for Level 5 and retain the finish transition.
- Confirm the Level 5 moon result separately from the finish result.
- Run the content, final-HTML, internal-link, sitemap and narrow-screen release gates.
What was and was not tested
Playtest boundary
- Test environment
- Headed Chrome 150.0.7871.114 on Linux (X11), software WebGL and keyboard input.
- Verified completions
- World 9, Levels 1, 3 and 4.
- Partial evidence
- Level 2 through the first-shaft approach; Level 5 through both signal mechanisms.
- Still unknown
- The complete Level 2 route, the repeatable Level 5 finish pattern and their moon requirements.
All route inputs used the normal keyboard controls. Read-only runtime inspection identified room state and transitions; no player position, room object, unlock state or completion flag was altered.
Visible source record
Sources
- Open source ↗S32 Oozy's Lab World 9, Level 1 completed current-build playtestOozysLabGame.com editorial playtest · direct current-version playtest on the official host · checked August 2, 2026
The completed playtest used Google Chrome 150.0.7871.114 on Linux (X11) with software WebGL. Keyboard input and read-only runtime inspection were pinned to an exact task-owned background target and its exact game worker. No room object, player position, completion flag or unlock state was changed. A third-party recording and GLM Vision were used only as route-screening aids; visually inconsistent claims were rejected, and the factual record comes from the independently reproduced live-build completion.
- Open source ↗S36 Oozy's Lab World 9, Level 2 partial current-build playtestOozysLabGame.com editorial playtest · direct current-version playtest on the official host · checked August 2, 2026
Partial playtest used Google Chrome 150.0.7871.114 on Linux (X11) with software WebGL. Keyboard input and read-only runtime inspection were pinned to the exact task-owned background target and its game worker. No room object, player position, completion flag or unlock state was changed. Further testing paused when Poki entered an ad-break loading screen that remained unresolved during a bounded wait; no extension or browser-global setting was changed, and the page was not refreshed to bypass the break. GLM Vision was used only to screen the local capture, and its mistaken classification of the game's built-in SKIP?/AD control as third-party advertising was rejected after direct image and page-context review.
- Open source ↗S33 Oozy's Lab World 9, Level 3 completed current-build playtestOozysLabGame.com editorial playtest · direct current-version playtest on the official host · checked August 2, 2026
The playtest used Google Chrome 150.0.7871.114 on Linux (X11) with software WebGL. Keyboard input and read-only runtime inspection were pinned to an exact task-owned page and its exact game worker while the shared headed target remained in the background. No object position, player position, completion flag or unlock state was changed. The project-version string was not re-read during this playtest unit, so the record is dated by the live-build check instead. GLM Vision was used only to screen local frame candidates; ambiguous descriptions were rejected and no GLM-only visual claim is included.
- Open source ↗S34 Oozy's Lab World 9, Level 4 completed current-build playtestOozysLabGame.com editorial playtest · direct current-version playtest on the official host · checked August 2, 2026
The playtest used Google Chrome 150.0.7871.114 on Linux (X11) with software WebGL. Keyboard input and read-only runtime inspection were pinned to an exact task-owned page and its exact game worker while the shared headed target remained in the background. No object position, player position, completion flag or unlock state was changed. The project-version string was not re-read during this playtest unit, so the record is dated by the live-build check instead. A third-party recording was screened only as a route-location lead; the factual record comes from the independently reproduced current-build completion.
- Open source ↗S35 Oozy's Lab World 9 Level 5 direct playtestOozysLabGame.com editorial playtest · direct current-version playtest on the official host · checked August 2, 2026
Partial direct playtest on desktop Chrome with keyboard controls. The mechanism order is directly observed; the final repeatable saw-avoidance route remains unverified, so the walkthrough record stays draft.
- Open source ↗S8 Oozy's Lab Poki GameYouTube · third-party gameplay video · checked August 2, 2026
Rechecked August 2, 2026 against the exact video ID's YouTube storyboards and 638 browser captures sampled every two source seconds. A July 27 note had mistakenly treated frame indices as elapsed seconds and therefore understated the recording as Worlds 1–5; visible labels establish that it reaches World 14. The uploader description calls the moon a target, while the visible tutorial calls that moon optional. Neither statement is generalized to every current Level. No video frame may be republished as site artwork.
- Open source ↗S1 Oozy's Lab on PokiPoki · official game host · checked August 2, 2026
Poki's July 2026 release metadata is recorded separately from the developer page and forum launch dates. The moon wording is not treated as proof that every current level has the same completion condition. S13 directly completed the five tested World 1 Levels without collecting their moons.